
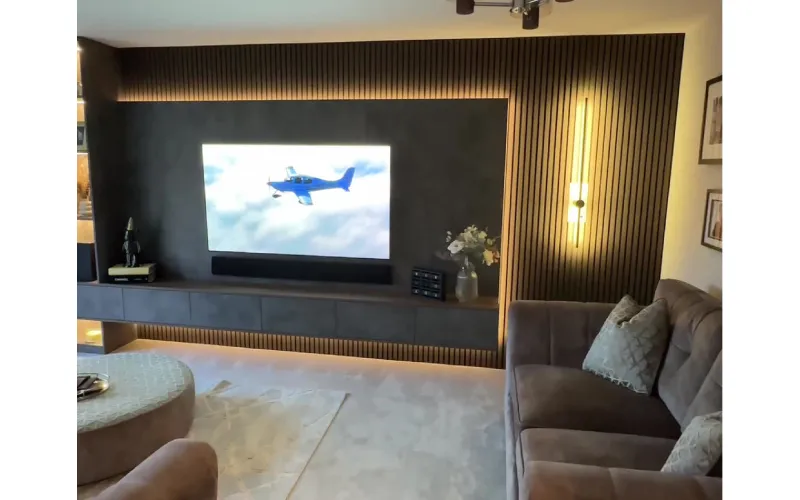
One common mistake during media wall installation is not reading the instructions carefully, which often leads to using the wrong screws or ignoring safety advice. Many rush through assembling the mount and end up with an unstable setup that might damage both TV and wall. People also forget to locate wall studs, causing insecure mounting that risks falls. Another issue is ignoring cable management; messy wires spoil the look and create functional problems. Mounting the TV too high or not leveling it properly can cause discomfort and poor viewing angles. Lastly, skipping professional help for complex setups might result in costly mistakes or void warranties.
Not Reading Manufacturer Instructions Carefully
One of the most common mistakes during media wall installation is skipping or rushing through the manufacturer’s instructions. These manuals contain vital information about safety warnings, the correct hardware to use, and specific installation steps that ensure the mount and TV are secure. For example, using the wrong screws or anchors because you ignored the specifications can lead to an unstable setup that risks the TV falling. It’s also important to verify the TV’s weight and size limits listed by the manufacturer; exceeding these limits compromises the mount’s integrity. Many instructions include details about the recommended tools and hardware, ignoring these can result in improper assembly and damage to both the wall and the device. Additionally, missing cable connection instructions could cause loose ports or damaged cables, affecting functionality. Manuals often highlight the types of walls suitable for mounting and any restrictions, which if overlooked, could lead to mounting failures. Steps related to locking mechanisms or safety locks are usually critical for preventing accidental falls but are easily missed if instructions aren’t followed closely. Also, tilt or swivel adjustments have limits that protect the mount from damage; ignoring these can cause mechanical issues. Not adhering to torque or tightening guidelines risks loose mounts that may loosen over time. Lastly, many warranties depend on following proper installation procedures exactly; neglecting instructions could void your warranty and leave you unprotected if something goes wrong.

Skipping Steps in Mount Assembly
Skipping steps during mount assembly can lead to serious problems like misalignment, instability, or even damage to your TV and wall. For example, assembling parts out of order might cause the mount to not fit properly or hold unevenly, which compromises safety. Forgetting to include washers or spacers is another common mistake; these small components protect both the TV and the mount by distributing pressure and preventing scratches. It’s also crucial to tighten bolts evenly, uneven tightening can put too much stress on certain points, increasing the risk of failure. Some installers leave out mounting brackets or crossbars that provide extra support, which weakens the overall structure. Locking screws are often overlooked, yet they prevent the mount from accidentally releasing. Safety cables or secondary supports recommended by the manufacturer should always be attached, as they act as a fail-safe in case the primary mount fails. Rushing through assembly increases the chance of stripped threads or damaged parts, which might require starting over or replacing components. Skipping a test fit before fully tightening bolts can lead to rework if things aren’t aligned properly. Additionally, neglecting to check if accessories or adapters are compatible with your mount can cause fitting issues. Finally, ignoring torque specifications can result in bolts being too loose or overtightened, both of which threaten the mount’s integrity. Taking the time to follow every step carefully ensures a stable, safe installation that protects your investment.
- Assembling mount parts out of order causing misalignment or instability.
- Forgetting to install washers or spacers that protect the TV and mount.
- Ignoring the need to tighten bolts evenly to distribute load safely.
- Leaving out mounting brackets or crossbars that add support.
- Not securing locking screws that prevent accidental mount release.
- Failing to attach safety cables or secondary supports where recommended.
- Rushing the assembly causing stripped threads or damaged components.
- Skipping test fitting before final tightening, leading to rework.
- Neglecting to check compatibility of added accessories or adapters.
- Overlooking the need to follow torque specifications for screws and bolts.
Ignoring Cable Management and Planning
One of the most common mistakes during media wall installation is neglecting cable management and proper planning. Not measuring cable lengths beforehand often leads to cables that are either too tight or stretched, increasing the risk of damage or disconnections. Without planning cable routes, wires end up tangled and visible, detracting from the clean look of the installation. Utilizing in-wall cable routing can significantly improve the appearance, yet many skip this step. Additionally, failing to use cable organizers like clips, ties, or raceways means cables can hang loose and create clutter. Mounts placed too close to the wall limit access to cables, making connections difficult and future upgrades a hassle. It’s also critical to allow enough space for adding devices or upgrading cables later on. Separating power cables from signal cables helps prevent interference and signal loss, but this is often overlooked. Not labeling cables can cause confusion during maintenance or when adding new devices. Cables have bending limits, and ignoring these can cause internal damage, reducing their lifespan. Finally, tightly bundling cables without considering ventilation can block airflow around devices, leading to overheating and reduced performance.
Failing to Level the TV Properly
One of the most common mistakes during media wall installation is failing to level the TV properly. Many installers skip using a spirit level or laser level, assuming the wall is perfectly straight and even, which is rarely the case. Even slight tilts can disrupt viewing angles and cause neck or eye strain over time. Mounting the TV crooked not only looks unprofessional but can also be distracting during use. It’s important to adjust mounting brackets to accommodate any uneven walls or surfaces instead of forcing the mount flat. Another overlooked step is rechecking the level after tightening bolts, as the TV can shift or deform slightly under pressure if mounted too tightly. Ignoring manufacturer instructions on tilt or swivel adjustments can also result in a poor viewing experience. Plus, leveling the screen without considering the viewer’s seating position defeats the purpose of a comfortable setup. Finally, an unlevel TV impacts stability and weight distribution, which can increase stress on mounting points and risk damage. Taking the time to level the TV precisely ensures a stable, visually pleasing, and ergonomic media wall.
Not Locating and Using Wall Studs
One of the most common and costly mistakes in media wall installation is failing to properly locate and use wall studs. Drilling directly into drywall without anchoring into studs risks mount failure and can cause the TV to fall, damaging both the wall and your equipment. Many try to use inadequate anchors or fasteners that aren’t rated for the TV’s weight, which simply won’t hold up over time. It’s also important to consider stud spacing because mount brackets need to align with the studs for maximum support. Simply assuming studs are evenly spaced or relying on guesswork can lead to misaligned mounts and weak attachments. Using a stud finder incorrectly may result in missed studs or false positives, so take the time to test and verify stud locations carefully. Additionally, not checking the depth or quality of the stud can lead to mounting into damaged or hollow areas that won’t provide sufficient support. For walls made of plaster or hollow materials, relying on drywall anchors or masonry anchors without reinforcement is a recipe for disaster. Before drilling, always be cautious of potential electrical wiring or plumbing inside the studs to avoid hazards. It’s also a good practice to find multiple studs to distribute the TV’s weight evenly rather than relying on a single point. Mounting on unsupported drywall sections puts unnecessary stress on the wall, leading to cracks, holes, or worse, a falling TV. Taking the time to locate and secure mounts into solid studs is crucial for a safe and durable installation.
Choosing an Unsuitable Wall or Location
One of the biggest mistakes during media wall installation is picking a wall that can’t properly support the weight of the TV and mount. Drywall without studs or walls made of weak materials risk mounting failure and potential damage. Avoid walls with excessive moisture or temperature swings, like bathrooms or poorly insulated exterior walls, since these conditions can warp mounts or damage electronics. Placing the TV where direct sunlight hits the screen often causes glare and can shorten the TV’s lifespan due to overheating. Similarly, mounting the TV where reflections from windows or lights are constant will ruin the viewing experience. It’s important to consider room layout and seating arrangement to ensure everyone gets a clear view without straining their neck. Also, don’t overlook power outlet access and cable routing: a wall with limited or distant power sources can lead to messy cable runs or the need for extension cords. Avoid installing the TV above heat sources like fireplaces, as rising heat can cause overheating issues. Exterior walls prone to vibrations or structural shifts should be off-limits since they can loosen mounts over time. Lastly, ensure there’s enough space around the TV for proper ventilation and accessory placement; cramped walls can cause overheating and limit future upgrades. Taking these factors into account from the start helps avoid costly mistakes and ensures a safe, comfortable, and enjoyable media wall setup.
Mounting the TV Too High
Mounting the TV too high on the wall is a common mistake that can seriously affect comfort and viewing quality. When the screen is placed above seated eye level, it forces viewers to tilt their heads upward, leading to neck and eye strain over time. Industry experts generally recommend positioning the center of the screen between 42 and 48 inches from the floor, aligning with the average seated eye height. Installing the TV based solely on available wall space, like above a fireplace mantel, often ignores these ergonomic guidelines and results in awkward viewing angles. Without considering seating height and posture, the image can appear distorted, colors may shift, and remote sensors or soundbar alignment can suffer. Fixed mounts without tilt features can make these issues worse by not allowing adjustments to compensate for the height. Additionally, mounting the TV too high complicates cable access and routine maintenance. It’s also important to remember that people of different heights, such as children or standing viewers, may have different viewing needs, so planning for a flexible setup can help accommodate everyone. Proper height placement ensures a more natural, comfortable experience and reduces the risk of physical discomfort during extended viewing.
Overlooking Ventilation Needs
One common mistake during media wall installation is neglecting proper ventilation for your TV and devices. Installing a TV inside enclosed cabinetry without airflow openings can trap heat, causing the TV to overheat and potentially shorten its lifespan. Placing the TV too close to walls or objects that block vents also restricts airflow. It’s important to follow the manufacturer’s clearance recommendations to allow heat to dissipate effectively. Stacking devices tightly or ignoring the heat generated by nearby soundbars, gaming consoles, or other components can lead to excessive heat buildup. Indoor environments with poor ambient ventilation or high humidity make this worse. Additionally, blocking vents with cable bundles or mounting hardware restricts airflow further. Many overlook the temperature limits specified in the TV manual and fail to plan for active cooling options if needed, such as fans or vents in cabinetry. Dust buildup over time can clog vents and fans, so regular cleaning is essential to maintain proper airflow. Ignoring these ventilation needs can lead to overheating, device malfunctions, and even permanent damage, so it’s crucial to plan media wall installations with adequate space and airflow in mind.
Overloading Power Outlets
One of the most common mistakes during media wall installation is overloading power outlets. Plugging multiple high-draw devices like TVs, AV receivers, gaming consoles, and streaming boxes into a single power strip or outlet can easily exceed the circuit’s capacity. This can cause circuit breakers to trip or, worse, create fire hazards. Using cheap power strips without surge protection puts expensive electronics at risk during power surges or storms. It’s important to check the power requirements for each device and avoid relying on extension cords or strips that aren’t rated for the total wattage. Ideally, distribute the power load across multiple circuits if available, and use dedicated circuits for critical devices such as large TVs or receivers. Ignoring grounding requirements can also lead to electrical faults or shocks. Additionally, don’t ignore visible signs of electrical stress like warm outlets or flickering lights; these often indicate overloads or faulty wiring needing immediate attention. Including backup power solutions and quality surge protectors helps safeguard your media wall against unexpected electrical damage.
Avoiding Professional Help for Complex Setups
Trying to install a media wall with complex features without professional help often leads to costly mistakes. Mounting on difficult surfaces like concrete, brick, or uneven drywall requires the right tools and know-how; otherwise, you risk damaging your walls or the TV itself. Integrated smart setups need careful attention to electrical and networking wiring, ignoring these details can cause connectivity problems or even interference between devices. Without proper integration, multiple devices might not communicate well, leading to frustrating performance issues. Professionals also ensure compliance with local building codes and safety standards, which is something many DIY installers overlook, potentially resulting in fines or unsafe conditions. Improper installation can void manufacturer warranties, leaving you responsible for repairs or replacements. People often underestimate the time and effort needed for complex wiring and cable routing, which can result in messy, unsafe setups. Professionals use specialized mounting hardware and precise adjustments to secure equipment safely and neatly. They also test and troubleshoot the entire system after installation to make sure everything works smoothly. Finally, professionals balance both the aesthetic and functional design of your media wall, something that’s easy to miss when going it alone, ensuring a polished look and reliable performance.
Forgetting Sound System Integration
Many people overlook the importance of planning for sound system integration during media wall installation. Built-in TV speakers usually provide weak or flat audio, which can significantly reduce the overall viewing experience. Failing to consider external sound devices like soundbars or surround speakers early on limits your audio options later and can make it difficult to add or position these components effectively. Proper speaker placement is essential for balanced sound, so ignoring this during installation often means struggling to find the right spots afterward. Additionally, not routing speaker cables neatly inside the wall or using cable management solutions leads to visible clutter or tangled wires, detracting from a clean setup. Compatibility issues between the TV, soundbar, and receivers are common when these devices aren’t selected or planned together, causing frustrating connectivity or sync problems. Another frequent mistake is neglecting to plan for power outlets near sound equipment, forcing awkward setups with extension cords. Some installers also miss out on wireless sound system options, which can limit flexibility and make future upgrades harder. Forgetting to allocate space for subwoofers or extra audio components reduces your chances of achieving richer bass and fuller sound. Finally, skipping audio tests before finalizing the installation can cause unexpected delays, and failing to integrate audio controls with TV remotes or smart home systems complicates everyday use. Taking the time to include sound integration in your media wall plan avoids these issues and leads to a more enjoyable entertainment setup.
Not Planning for Future Upgrades
A common mistake during media wall installation is focusing solely on current devices without considering future upgrades. This often leads to a setup with too few power outlets, making it a hassle to add new gear like streaming boxes or gaming consoles later. Without extra cable pathways, adding or replacing devices can become a tangled mess, forcing you to open walls or reroute cables. Fixed mounts that lack adjustability limit your ability to fit larger or differently sized TVs down the line. Ignoring evolving technology standards such as updated HDMI versions or wireless protocols can cause compatibility issues when you upgrade equipment. Also, failing to reserve space for additional devices or sound systems restricts your options for expanding your entertainment setup. Ventilation is another overlooked factor, stacking multiple devices without enough airflow can cause overheating problems. Choosing wall materials or mounting solutions that are difficult to modify can make future adjustments costly and complicated. Lastly, skipping documentation or labeling of cable routes and power sources turns any future changes into a confusing, time-consuming task. Planning ahead with extra outlets, flexible mounts, and clear cable management saves a lot of headaches as your media wall evolves.
Frequently Asked Questions
1. What are common alignment mistakes to avoid when installing a media wall?
A common mistake is not measuring properly before mounting, which can result in uneven or crooked panels. It’s important to use a level and double-check measurements to ensure everything lines up correctly.
2. How can I prevent damage to the wall during media wall installation?
Avoid drilling into electrical wires or plumbing by using a stud finder. Also, protect the wall surface by using appropriate anchors and handling panels carefully to prevent dents or scratches.
3. Why is choosing the right mounting hardware important for media walls?
Using incorrect or low-quality mounting hardware can lead to instability and even wall damage. It’s crucial to select anchors and screws rated for the media wall’s weight and the type of wall surface you’re working with.
4. What mistakes should I avoid regarding cable management in media wall setups?
Not planning for cable routing can cause clutter and strain on cables. Avoid leaving wires exposed or tightly bent; instead, plan channels or use cable covers to keep everything organized and safe.
5. How can poor lighting affect the installation and appearance of a media wall?
Ignoring lighting can result in glare or shadows that reduce screen visibility. Make sure to consider ambient light sources and position the media wall to minimize reflections and enhance the viewing experience.
TL;DR Avoid common media wall installation mistakes by thoroughly reading instructions, properly assembling mounts, and securing mounts to wall studs. Plan cable management and ventilation, mount the TV at eye level on a suitable wall, and avoid overloading power outlets. Consider sound system integration and future upgrades, and don’t hesitate to get professional help for complex setups to ensure safety, functionality, and a clean, enjoyable viewing experience.

Seth Hatfield, a maverick in the realm of writing, seamlessly weaves tales from the world of construction and beyond. With a unique blend of insight and creativity, he invites readers on a journey through his diverse repertoire of articles.